The Role of Remote Controls in Enhancing Home Theater Experiences

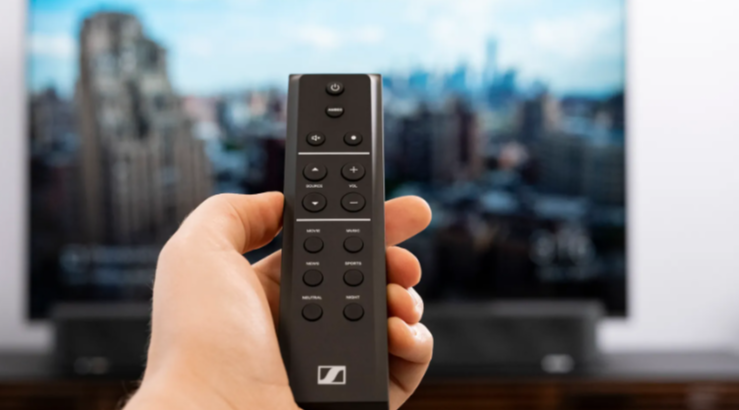
In the realm of home entertainment, the home theater system stands as a beacon of immersive viewing experiences, akin to bringing the cinema into the living room. Central to this setup’s functionality and ease of use is a device that might seem unassuming at first glance but is indeed pivotal—the remote control. This device has undergone significant transformations over the years, each innovation aimed at further enriching the user’s interaction with their entertainment system.

The Heart of Convenience

The integration of remote controls into home theater systems has revolutionized user interaction, bringing unprecedented convenience. The need to manually adjust settings or switch between devices is a thing of the past. With a remote, control is quite literally at your fingertips, allowing for a seamless and uninterrupted viewing experience.

The modern remote control consolidates the functionality of multiple devices into one, streamlining operations and enhancing the user experience by providing a single point of control for the entire home theater setup. This level of convenience is not merely about reducing physical effort; it’s about enriching the viewing experience by making it smoother and more enjoyable.

Advanced Features and Functionality

The technological evolution of remote controls has endowed them with features that significantly enhance the interaction with home theater systems. Voice commands allow for hands-free operation, adding a layer of convenience and accessibility. Touch screens and programmable buttons offer personalized control, making it easier to navigate and access favorite functions quickly. These advancements in remote control technology not only make the user experience more intuitive but also add a touch of modernity to the home theater setup.

Universal Remote Controls: A Game Changer

The development of universal remote controls represents a significant leap forward in the management of home entertainment systems. These devices consolidate the functions of multiple remotes into one, offering a solution to the clutter and complexity of using different remotes for different devices. Universal remotes simplify the operation of home theaters, making it easier and more intuitive to control various components of the system, regardless of brand or model. This innovation has greatly enhanced the usability of home theaters, making them more accessible and enjoyable for users.

Customization and Personalization

Remote controls now offer features for customization and personalization, further enhancing the home theater experience. Programmable buttons can be set up for quick access to favorite channels or settings, allowing for a more personalized interaction with the system. Advanced remotes that support user profiles enable each user to have a tailored experience, with their preferences and settings saved and easily accessible. This level of personalization not only improves the functionality of remote controls but also makes the viewing experience more enjoyable and suited to individual preferences.

Enhancing the Aesthetic Appeal

The design and aesthetics of remote controls have evolved to complement the modern home theater setup. Ergonomic designs ensure comfort during extended use, while backlit buttons add a functional elegance, making it easy to control the system even in low-light conditions. The visual appeal of a well-designed remote enhances the overall experience, contributing to the sophisticated ambiance of the home entertainment environment.

Future Trends in Remote Control Technology

The horizon of remote control technology is brimming with potential advancements that promise to further revolutionize our interaction with home theater systems. Innovations such as gesture control could introduce a new level of intuitive operation, allowing for seamless adjustments with simple hand movements.

The integration of remote controls with smart home devices is another exciting possibility, offering centralized control over the entire home environment. These future developments in remote control technology are set to make the home theater experience even more immersive and user-friendly.

Remote controls have become an indispensable part of the home theater experience, offering not just a means of control but a gateway to a more immersive and personalized entertainment environment. Their evolution from basic channel changers to advanced, feature-rich devices underscores their significance in the modern home theater setup. As technology continues to advance, we can look forward to even more innovative features that will make our interactions with home entertainment systems more intuitive and enjoyable.

At Replacement Remotes, we specialize in providing a wide range of high-quality, compatible remote controls for various home theater systems. Our expertise ensures that you find the perfect remote to enhance your viewing experience, whether you’re in search of an advanced universal remote or a replacement for your original device. Explore our collection and take a step toward upgrading your home theater experience.

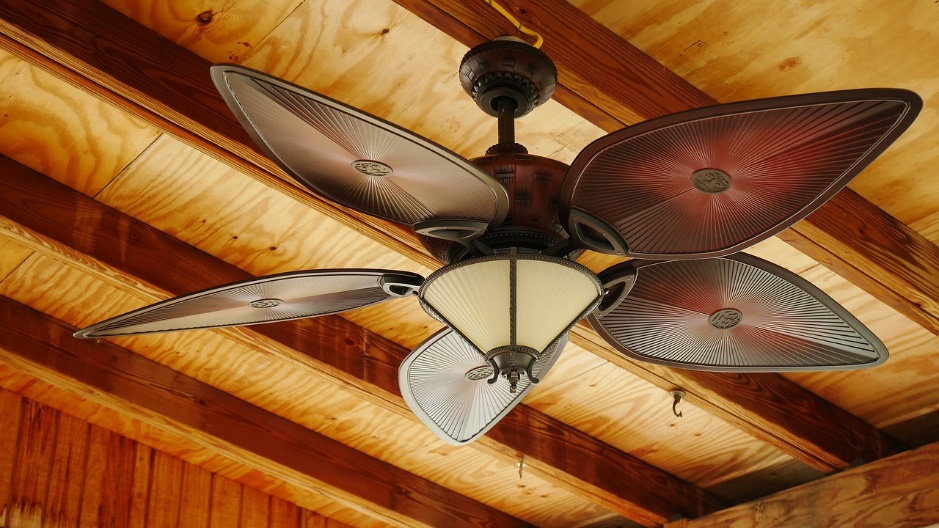
brown and white 5 blade ceiling fan with light fixture

Troubleshooting Common Ceiling Fan Remote Issues

Ceiling fan remotes have transformed the way we experience comfort within our homes. These handy devices allow us to adjust fan speeds, turn lights on or off, and sometimes even set timers without needing to reach for a pull chain or wall switch. However, like all technology, they are not immune to issues. Recognizing and resolving these problems swiftly is crucial, as it ensures our convenience and comfort remain uninterrupted.

Understanding Your Ceiling Fan Remote

Before diving into troubleshooting, it’s essential to understand the key components of your ceiling fan remote. At its core, the remote consists of a transmitter (the handheld device) and a receiver (located inside the fan canopy). These components communicate wirelessly, typically using radio frequency or infrared signals. The remote is powered by batteries, and its compatibility with your ceiling fan model is paramount for seamless operation.

Common Ceiling Fan Remote Problems and Solutions

Battery-Related Issues

One of the most frequent culprits behind remote malfunctions is battery issues. Signs of battery problems can include intermittent operation or complete failure to respond. To address this, ensure you’re replacing batteries correctly, aligning them with the indicated polarity and using the recommended battery type.

Signal Interference

Signal interference can disrupt the communication between your remote and the ceiling fan. This interference can stem from numerous sources, including other wireless devices, thick walls, or large metal objects. To minimize interference, consider repositioning the receiver within the fan canopy and removing any nearby obstacles that might block the signal.

Pairing Difficulties

Sometimes, the remote may lose its connection to the ceiling fan, necessitating a re-pairing process. This usually involves holding a specific button on the remote while turning the fan’s power on, but the exact steps can vary by model. Consult your fan’s manual for detailed instructions on pairing and resetting the remote’s settings.

Wear and Tear

Physical damage from drops or wear and tear over time can also affect remote functionality. Inspect your remote for any visible signs of damage. If the issues seem beyond simple troubleshooting, it might be time to seek professional help or consider a replacement.

Advanced Troubleshooting Techniques

Recalibrating the Remote

In some cases, recalibrating your remote can improve its performance. This process can involve specific sequences of button presses or power cycles. Check your remote’s manual for recalibration instructions tailored to your model.

Checking the Dip Switches

Dip switches are small switches inside the remote and the fan’s receiver that set the operating frequency. If your remote isn’t working, ensuring these switches match on both the remote and the receiver can sometimes resolve the issue. Adjusting dip switches can also help if you’re experiencing interference from other devices.

When to Replace Your Ceiling Fan Remote

If troubleshooting doesn’t resolve your issues, or if your remote has suffered irreparable damage, it might be time for a replacement. Upgrading to a newer model can offer advanced features like programmable timers, temperature control, or even smart home integration, enhancing your convenience and comfort.

Choosing the Right Replacement Remote

When selecting a new remote, consider factors such as compatibility with your ceiling fan, range of operation, and features that match your needs. Brands like Replacement Remotes offer a wide selection to meet diverse requirements, ensuring you find a remote that enhances your ceiling fan experience.

Preventative Measures and Maintenance Tips

To prolong the life of your ceiling fan remote, routine checks and maintenance are key. Ensure you’re using the right type of batteries and replace them before they’re completely drained to avoid leakage and damage. Storing remotes in a dry, temperate place can also prevent environmental damage.

Understanding how to troubleshoot common ceiling fan remote issues not only enhances your comfort and convenience but also saves you time and potentially, the cost of unnecessary replacements. For those times when a new remote is needed, companies like Replacement Remotes are invaluable resources for expert advice and a comprehensive selection of options. Empowering yourself with this knowledge ensures that the next time your ceiling fan remote acts up, you’ll be well-equipped to address the problem head-on.

Home Theater

Home Theater Essentials: Must-Have Accessories for an Immersive Entertainment Experience

Creating a home theater experience that immerses you in the magic of cinema is a dream for many. Whether you’re a movie buff, a sports enthusiast, or a gaming aficionado, having the right accessories can make all the difference. In this guide, we’ll explore the must-have accessories for your home theater setup, helping you transform your living room into a cinematic oasis.

Choosing the Right TV

The centerpiece of any home theater is the television. When it comes to choosing the right TV, several factors should influence your decision. First and foremost is the type of display technology.

LED, OLED, and QLED are the most common display technologies available today. LED TVs are known for their affordability and energy efficiency. OLED TVs offer deeper blacks and wider viewing angles, making them ideal for home theaters. QLED TVs, on the other hand, provide vibrant colors and high brightness levels.

Besides display technology, screen size is another critical consideration. The ideal screen size depends on the size of your room and your seating distance. To determine the right size, experts often recommend that your seating distance should be approximately 1.5 to 2.5 times the diagonal screen size.

Surround Sound Systems

A high-quality surround sound system can take your home theater experience to the next level. It immerses you in the audio, making you feel like you’re right in the middle of the action. There are various types of surround sound systems, with 5.1 and 7.1 setups being the most common.

A 5.1 surround sound system consists of five speakers and one subwoofer. It offers a rich and immersive audio experience. If you want an even more intense sound experience, consider a 7.1 system, which includes two additional rear speakers. Brands like Bose, Sonos, and Yamaha are known for their excellent surround sound systems.

Media Streaming Devices

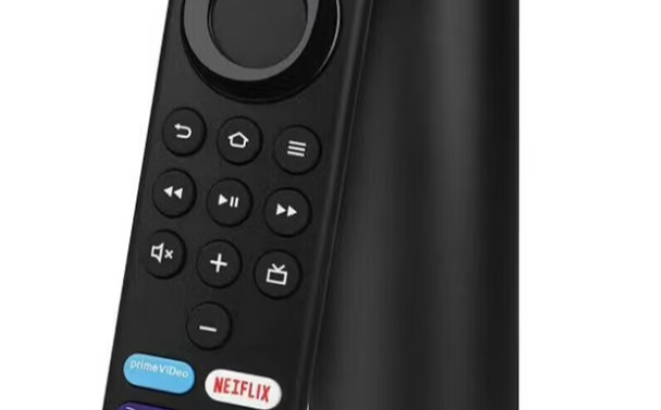
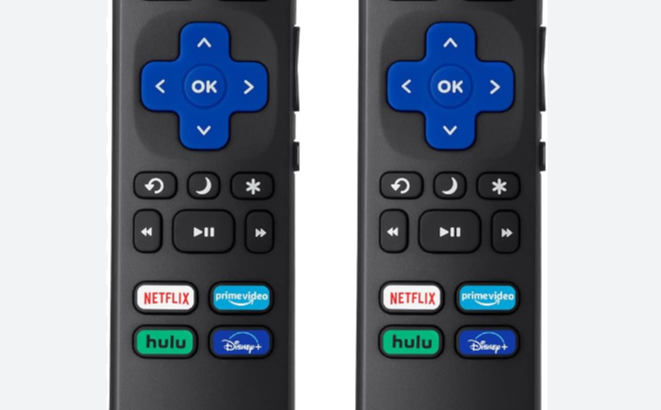
In today’s digital age, media streaming devices are a must for any home theater setup. They allow you to access streaming services like Netflix, Hulu, and Disney+ directly from your TV. Some of the popular streaming devices include Roku, Apple TV, and Amazon Fire TV.

Roku is known for its user-friendly interface and a wide range of channels and apps. Apple TV offers integration with the Apple ecosystem and features like AirPlay. Amazon Fire TV provides access to Amazon Prime Video and a variety of Alexa voice control features. Choose the one that aligns with your streaming preferences and ecosystem.

Comfortable Seating

Comfortable seating is often overlooked but is a crucial aspect of your home theater experience. After all, you’ll be spending hours watching movies or playing games, so you’ll want seating that provides both comfort and support.

Options range from recliners and home theater sofas to bean bags and even dedicated home theater seating with cup holders and built-in speakers. Choose seating that suits your style, fits your room, and allows for proper viewing angles.

Lighting and Ambiance

The right lighting can set the mood and enhance your home theater ambiance. Consider installing smart lighting solutions that allow you to control the intensity and color of the lights with a touch of a button or a voice command.

Dimmable LED strips behind your TV or around the room can create a cinematic atmosphere. Make sure the lighting is adjustable to prevent glare on the screen while maintaining a cozy environment.

Cable Management

One often overlooked aspect of setting up a home theater is cable management. With multiple devices and speakers, it’s easy for cables to become a tangled mess. Invest in cable management solutions to keep your setup clean and organized.

Cable clips, cable sleeves, and cable trays can help you route and conceal wires effectively. A tidy setup not only looks better but also reduces the risk of tripping hazards.

Remote Control Options

Controlling your home theater components efficiently is crucial for a seamless experience. While you can use individual remotes for each device, a universal remote control simplifies the process.

Universal remotes are designed to work with multiple devices, such as your TV, sound system, and streaming device. Some even offer advanced features like voice control and smartphone app integration. Programming these remotes to operate your devices is relatively straightforward and can save you the hassle of juggling multiple remotes.

Calibration and Fine-Tuning

To ensure your home theater delivers the best audio and video quality, calibration and fine-tuning are essential. Most TVs and sound systems come with built-in calibration tools that guide you through the process.

Calibrating your TV involves adjusting settings like brightness, contrast, color, and sharpness to match your room’s lighting conditions. Similarly, sound systems require calibration to optimize the audio for your specific room dimensions.

Maintenance and Upgrades

Maintaining your home theater equipment is essential for long-lasting performance. Regularly clean your TV screen and speakers to prevent dust buildup. Check for software updates on your streaming devices and sound systems to ensure they run smoothly.

Over time, you may also want to consider upgrades. Technology evolves rapidly, and newer models may offer improved picture quality, sound, or additional features. Stay informed about the latest advancements to decide when it’s time to invest in an upgrade.

Don’t Forget the Remote

Creating an immersive home theater experience is achievable with the right accessories. Start by selecting the ideal TV, choosing a surround sound system, and incorporating media streaming devices. Don’t forget about comfortable seating, lighting, and effective cable management.

Investing in a universal remote control simplifies the operation of your devices, and calibration ensures optimal audio and video quality. Regular maintenance and staying open to upgrades will keep your home theater at the forefront of entertainment technology.

By carefully considering and implementing these essentials, you’ll transform your living room into a captivating home theater that provides countless hours of cinematic enjoyment for you and your family.

brown and white 5 blade ceiling fan with light fixture

What to Consider When Buying a Remote for Your Ceiling Fan

Ceiling fans are more than just household appliances; they are an essential part of home comfort and interior aesthetics. In the modern era, the addition of a remote-controlled ceiling fan elevates this comfort to a new level, offering convenience and functionality at your fingertips. Whether you’re retrofitting an old fan with a new remote or purchasing a new setup altogether, understanding what to look for in a ceiling fan remote is crucial.

At Replacement Remotes, a pioneer in the remote control industry since 1987, we understand the importance of finding the right remote for your ceiling fan. Our commitment to customer satisfaction and innovation is reflected in our diverse product range and service excellence.

We’ve been part of the technological evolution, witnessing the shift from traditional to remote-controlled fans, and we’re here to share our expertise. So, let’s dive into the key factors you should consider when purchasing a ceiling fan remote, ensuring you make a choice that enhances both your home’s comfort and convenience.

1. Compatibility

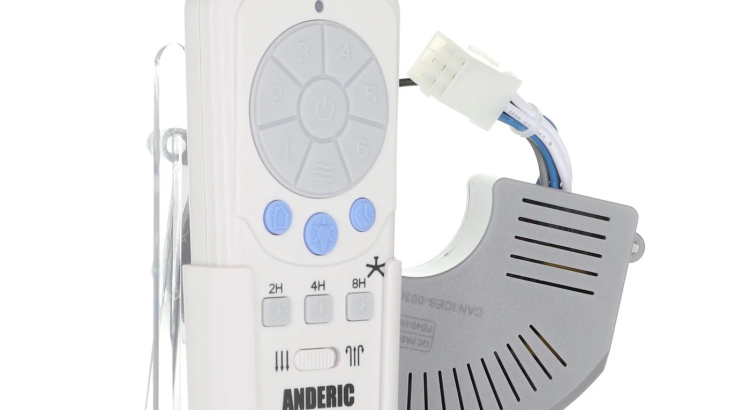
The foremost factor to consider is compatibility. Ensure that the remote is compatible with your ceiling fan model. Some remotes are universal, while others are designed for specific brands or models. At Replacement Remotes, we stock an extensive range of remote controls, including our exclusive ANDERIC line, which offers replacements for many discontinued or hard-to-find models.

2. Features and Functionality

A ceiling fan remote can vary in features. Basic models offer simple controls like on/off, speed adjustment, and sometimes a light switch. Advanced models might include timer functions, temperature control, or even smart home integration. Consider what features are essential for your lifestyle. For instance, a remote with a timer can be a godsend for those who like to fall asleep to a gentle breeze.

3. Range

The operating range of the remote is crucial, especially in larger rooms. A good remote should be able to control the fan from any corner of the room. Our remotes at Replacement Remotes are tested for optimal range, ensuring your comfort and convenience.

4. Design and Ergonomics

A remote’s design is not just about aesthetics; it’s also about functionality and ease of use. Look for a remote that fits comfortably in your hand, with buttons that are easy to navigate. The ANDERIC remotes are designed with user-friendliness in mind, sporting an intuitive layout and a comfortable grip.

5. Battery Life and Type

Check the type of batteries the remote requires and consider their lifespan and availability. Some remotes have power-saving features to extend battery life, a practical aspect if you’re not keen on frequent battery replacements.

6. Price

Price is always a consideration, but it’s important to balance cost with quality and features. At Replacement Remotes, we offer competitive pricing without compromising on quality. Our ANDERIC line, for instance, provides premium functionality at an affordable price.

7. Warranty and Support

A good warranty and customer support are indicative of a company’s confidence in its product. We stand behind our products at Replacement Remotes, offering robust warranties and exceptional customer support to assist with any issues or questions.

8. Additional Features

Some remotes come with extra features like LED backlighting, which can be useful in dimly lit rooms, or a wall cradle for easy storage. These additional features, while not essential, can enhance your user experience.

9. Aesthetic Appeal

While functionality is key, the aesthetic appeal of the remote should not be overlooked. A well-designed remote can complement your room’s decor. We offer a variety of styles and designs to match different tastes and interiors.

10. Ease of Installation and Setup

Consider how easy it is to install and program the remote. Many modern remotes come with straightforward, user-friendly instructions. At Replacement Remotes, our customer service team is always ready to assist with setup and programming queries.

Choosing the right remote for your ceiling fan is about balancing functionality, compatibility, design, and budget. At Replacement Remotes, we understand the importance of this balance. With our vast inventory, including our renowned ANDERIC line, we’re confident you’ll find the perfect remote to enhance your ceiling fan experience. Shop with us and enjoy the blend of quality, variety, and top-notch customer service

bunch of remotes

3 Tips for Maintaining Your Remote Controls for Longevity

In a world increasingly governed by technology, remote controls have become indispensable tools in our daily lives. They bridge the gap between us and our devices, offering convenience and efficiency. However, their continuous use also subjects them to wear and tear. Maintaining your remote controls is not just about prolonging their lifespan; it’s about ensuring uninterrupted access to your favorite devices and appliances.

Regular Cleaning and Care

Regular cleaning and care are crucial for maintaining the functionality and longevity of your remote controls. Over time, dust and grime accumulate on the remote, which can interfere with its signal and button functionality. By regularly cleaning your remote, you can prevent this build-up, ensuring that it continues to operate smoothly. This maintenance step is simple but plays a significant role in preserving the effectiveness and responsiveness of your remote controls.

Turn Off and Remove Batteries: Always start by turning off the remote and removing the batteries to prevent damage.

Use a Soft, Dry Cloth: Gently wipe the surface of the remote to remove dust.

Cotton Swabs and Alcohol: For tougher grime around buttons, lightly moisten a cotton swab with rubbing alcohol and carefully clean around the buttons.

Dry Thoroughly: Ensure the remote is completely dry before replacing the batteries.

Clean the inside: Opening the remote and cleaning the backside of the keypad and the circuit board will help the keys function correctly. We have a step-by-step tutorial on how to do this at https://www.replacementremotes.com/generic/buy-fix-the-keys-on-any-remote-control-keypad-repair-kit-keypadrepkit.

Additional Tips:

  • Avoid using excessive liquid or abrasive cleaners.
  • Regularly clean the battery compartment to prevent corrosion.

Battery Maintenance and Replacement

Battery maintenance is a critical aspect of remote control care. The longevity and functionality of your remote largely depend on the condition of its batteries. It’s important to regularly check and replace them to avoid issues like leakage and corrosion, which can irreparably damage the remote. Choosing high-quality batteries and avoiding the mixing of different types or ages of batteries are also key practices. If you encounter minor corrosion, gently cleaning the contacts can help, but always handle leaking batteries with care and dispose of them safely.

Proper Usage and Handling

The way you handle your remote control can significantly affect its lifespan. These devices are designed for gentle use; rough handling, such as dropping or pressing buttons too hard, can harm their internal components. Protecting your remote with a case can prevent damage from accidental drops, and keeping it away from liquids is crucial to avoid internal damage. Additionally, storing your remote in a cool, dry place away from direct sunlight helps to preserve its integrity and functionality.

Using Protective Cases for Remote Controls

Adding a protective case to your remote control is an effective way to extend its lifespan. These cases, available in materials like soft silicone or hard plastic, provide a barrier against physical damage. They are particularly useful in cushioning the impact in case of accidental drops, which are among the common causes of internal damage to remotes.

Beyond protection from falls, these cases also help safeguard the remote from scratches, dust, and potential spills, keeping it in optimal condition for longer. For households with children or pets, or in high-traffic areas like living rooms, using a protective case can be a simple yet crucial step in preserving your remote control’s functionality and appearance.

Maintaining your remote controls doesn’t require much effort, but it makes a significant difference in their performance and lifespan. Regular cleaning, proper battery care, and gentle handling are key. By following these tips, you ensure that your remote controls remain reliable companions in your daily life.

For more maintenance tips, replacement parts, or if you’re in need of a new remote control, check out Replacement Remotes, your one-stop shop for all your remote control needs.

Two men installing a new TV on a wall mount

Wall Mounting Your TV: Tips and Tricks for a Perfect Installation

Are you considering wall mounting your TV to create a sleek and space-saving entertainment setup? At Replacement Remotes, we understand the appeal of a wall-mounted TV, and we’re here to help you achieve a perfect installation. Wall mounting not only enhances the aesthetics of your room but also maximizes floor space, reduces clutter, and offers an immersive viewing experience. In this comprehensive guide, we’ll share professional tips and tricks to ensure your TV wall mounting project goes smoothly.

Choosing the Right Wall Mount

Before you embark on your TV wall mounting journey, it’s crucial to select the right wall mount for your TV. Here are some considerations:

  1. TV Size and Weight: Ensure that the wall mount can support the size and weight of your TV. Check your TV’s specifications or consult with the manufacturer for this information.
  1. VESA Compatibility: Most TVs and wall mounts follow VESA (Video Electronics Standards Association) standards for mounting hole patterns. Ensure that your TV and wall mount have compatible VESA patterns for a secure fit.
  1. Tilt, Swivel, or Fixed: Decide whether you want a fixed, tilting, or swiveling wall mount. The choice depends on your viewing preferences and room layout.
  1. Cable Management: Some wall mounts come with built-in cable management systems to keep your wires organized and hidden.

Once you’ve chosen the right wall mount, let’s move on to the installation process.

Materials You’ll Need

Before you begin the installation, gather the following tools and materials:

  • Wall mount kit (including brackets and screws)
  • Stud finder
  • Level
  • Power drill and drill bits
  • Screwdriver
  • Measuring tape
  • Pencil
  • Anchors (if mounting on drywall)

Steps for a Perfect TV Wall Mount Installation

Find the Ideal Wall Location:

  • Use a stud finder to locate the wall studs. Mounting your TV on wall studs provides the necessary support for a secure installation.
  • Determine the ideal height for your TV. The center of the screen should be at eye level when you’re seated. Mark the wall with a pencil.

Assemble the Wall Mount:

  • Follow the manufacturer’s instructions to assemble the wall mount bracket. This typically involves attaching the brackets to the back of the TV.

Mark the Mounting Holes:

  • Position the wall mount on the wall at the desired height and use a level to ensure it’s perfectly horizontal.
  • Mark the mounting hole locations on the wall with a pencil.

Drill Pilot Holes:

  • Use a power drill and appropriate drill bit to create pilot holes where you marked the mounting holes. If you’re drilling into drywall, be sure to use wall anchors to secure the mount.

Secure the Wall Mount:

  • Attach the wall mount bracket to the wall using screws or wall anchors, depending on your wall type.
  • Double-check that the bracket is securely fastened and level.

Connect Cables:

  • Before attaching the TV to the mount, connect all necessary cables, including HDMI, power, and any other peripherals. This will make cable management easier.

Mount the TV:

  • Carefully lift the TV and align it with the wall mount bracket. Most brackets have a locking mechanism to secure the TV in place.
  • Check that the TV is level and securely attached.

Cable Management:

  • Use cable clips or channels to neatly route and hide the cables along the wall. This ensures a clean and organized look.

Final Adjustments:

  • After mounting, make any necessary adjustments to the TV’s tilt or swivel to achieve the desired viewing angle.

Test and Enjoy:

  • Turn on your TV and test all functions to ensure everything is working correctly. Sit back, relax, and enjoy your new wall-mounted TV!

Professional Tips and Tricks

  • If you’re unsure about finding wall studs or mounting on certain wall types, consider hiring a professional installer for a hassle-free experience.
  • Use a wall mount with a built-in bubble level for easy and accurate leveling.
  • Hide your TV’s power outlet and cable/satellite box using a recessed wall plate for a clean and minimalist appearance.
  • Ensure proper ventilation for your TV to prevent overheating. Avoid enclosing it in a tight space.

At Replacement Remotes, we’re committed to helping you make the most of your home entertainment setup. Wall mounting your TV is a fantastic way to transform your living space. With the right guidance, you can achieve a professional-looking installation. If you have any questions about compatible wall mounts, TV remote controls, or any other accessories, don’t hesitate to reach out to our expert team. We’re here to assist you every step of the way on your journey to a perfect TV wall mount installation. Enjoy your enhanced viewing experience!

Ready to elevate your entertainment experience with a perfectly mounted TV? Explore our selection of high-quality wall mounts and remote controls today to get started on your TV wall mounting project. Don’t settle for less—choose Replacement Remotes for all your home entertainment needs!

ceiling fan with lamp

Installation Tips for Ceiling Fans: DIY vs Professional Installation

Ceiling fans are a functional and decorative addition to any room, offering improved air circulation, temperature moderation, and, often, a dash of style. Whether you’re replacing an old fan or installing a new one, you might wonder whether to take the DIY route or to hire a professional. Both options have their merits, so let’s dive in and explore them!

DIY Installation: the Perks and the Process

Choosing to install a ceiling fan on your own can be a cost-effective decision. Generally, doing it yourself is cheaper, as you save on labor costs. Beyond the financial aspect, there’s also a sense of accomplishment that comes with completing a home improvement task on your own.

Before you begin, it’s essential to ensure you’ve selected the right type of ceiling fan for your room’s size and height. You should also gather all necessary tools. Some essentials include a ladder, screwdrivers, wire strippers, and a circuit tester. It’s also advisable to have a friend around, not only for safety but also to help handle the fan. Always prioritize safety by turning off the electricity at the circuit breaker before working on any electrical project.

If you’re replacing an old fan, remove it carefully, as this can give you some valuable insights into the wiring and mounting bracket. Every ceiling fan model is slightly different, so always refer to the provided manual for specific installation steps. Once you’ve successfully installed the fan, turn the power back on and test the fan’s functionality.

Professional Installation: Why It Might Be Worth It

Opting for professional installation comes with its set of advantages. One of the most prominent benefits is the expertise that professionals bring to the table. Having installed countless fans, they ensure a quicker and safer installation. Moreover, many professional installers are insured. This means that if any mishap occurs during installation, the associated costs are usually covered. Another notable advantage of hiring a pro is the quality assurance they offer. A professional will guarantee their work, ensuring the fan is securely mounted and wired correctly.

When you hire a professional, you can typically expect them to first inspect the installation site. This involves checking the electrical box to ensure it’s fan-rated and confirming that the ceiling can support the fan’s weight. Professionals often have specialized tools, which make the installation process smoother and faster. A significant advantage of professional installation is the post-installation cleanup. Professionals will often clean up after themselves, leaving your room just as they found it or even tidier.

The Long-Term Maintenance: Keeping Your Ceiling Fan in Top Shape

Once your ceiling fan is up and running, whether through DIY or professional installation, it’s essential not to overlook its long-term maintenance. A well-maintained fan not only runs efficiently but also ensures a prolonged lifespan, saving you money and potential replacement hassles in the long run.

Begin by cleaning the blades regularly to prevent dust accumulation, which can imbalance the fan and cause it to wobble. Every few months, check the fan’s screws and fittings to ensure they are tight and secure.

If you’ve opted for a model with lighting, keep an eye on the bulb and replace it when it starts to dim. For those who’ve taken the DIY installation route, this is an opportunity to continually familiarize yourself with the fan’s components. If any issues arise, such as unusual noises or erratic movements, address them immediately.

Sometimes, these might be simple fixes you can handle, but in other instances consulting a professional can be the safer choice. By dedicating a small amount of time to regular checks and maintenance, you can ensure your ceiling fan remains a valuable addition to your space for many years.

DIY vs. Professional: Key Considerations

The decision between DIY and professional installation for ceiling fans primarily rests on your comfort level, experience, and budget. If you’ve had prior experience with electrical work and are confident in your skills, DIY might be a viable option. However, it’s worth noting that DIY installations can take longer, especially if it’s your first time undertaking such a project. On the other hand, professionals can get the job done quickly due to their experience. Safety is another crucial consideration. Installing a ceiling fan requires working with electricity and lifting a heavy object overhead. If you’re ever in doubt, it’s always safer to opt for a professional installer.

In conclusion, choosing the right installation method for your ceiling fan boils down to your personal preferences and circumstances. Whichever route you decide on, always ensure that safety is prioritized. Ensure that your fan operates optimally, so you can enjoy its benefits for years to come. If you ever need replacement remotes for your ceiling fans or other devices, Replacement Remotes is always here to assist!

Harbor Breeze Ceiling Fan Remotes

Harbor Breeze is a trusted brand that provides innovative and high-quality ceiling fans for both residential and commercial purposes. To enhance user convenience, their range of ceiling fans comes equipped with advanced remote controls that revolutionize the way we interact with our cooling solutions.

Harbor Breeze ceiling fan remotes provide users with effortless control over the fan’s speed, lighting options, and even direction from anywhere in the room. These remotes offer unparalleled convenience by eliminating the need to manually operate or adjust your ceiling fan settings. Whether you want to enjoy a gentle breeze while reading on your couch or light up the room without needing to stand up, Harbor Breeze ceiling fan remotes ensure easy access to comfort at your fingertips.

How Do I Know I Need a New Harbor Breeze Ceiling Fan Remote?

There are several indications that you may need a new Harbor Breeze ceiling fan remote. Here are a few signs to look out for:

  • Non-responsive or malfunctioning: If your current remote is unresponsive, fails to control the fan’s speed or lighting properly, or exhibits other irregularities in its functionality, it might be time for a replacement.
  • Physical damage: If your remote has been subject to physical damage, such as being dropped, exposed to water, or experiencing wear and tear over time, it may affect its performance and warrant a new one.
  • Lost or misplaced: Sometimes remotes simply go missing or get misplaced. If you have searched high and low and are still looking for your original Harbor Breeze ceiling fan remote, it might be necessary to obtain a replacement.
  • Compatibility issues: If you have recently purchased a used Harbor Breeze ceiling fan and it did not come with a remote, or if you have upgraded your ceiling fan model but the existing remote is not compatible, you will need to acquire the appropriate remote for seamless operation.

How Do I Change the Batteries in My Ceiling Fan Remote?

To change the batteries in your Harbor Breeze ceiling fan remote, follow these steps:

  • Locate the battery compartment on your remote control. It is usually located on the back or underside of the remote.
  • If needed, use a screwdriver or coin to open the battery compartment cover by turning it counterclockwise or sliding it off, depending on the design.
  • Remove the old batteries from their slots and properly dispose of them according to local regulations.
  • Insert new batteries into their respective slots, ensuring they are placed in the correct orientation (matching positive (+) and negative (-) symbols).
  • Replace and secure the battery compartment cover by turning it clockwise or sliding it back into place.

How Do I Find Out What Harbor Breeze Ceiling Fan Remote I Need?

It’s important to ensure that you purchase the correct remote to guarantee optimal functionality and seamless integration with your ceiling fan. With the right Harbor Breeze ceiling fan remote, you can effortlessly control various settings and enjoy the utmost convenience and comfort in operating your ceiling fan from anywhere within your space.

Finding out which Harbor Breeze ceiling fan remote you need is a straightforward process. First, locate the model number of your Harbor Breeze ceiling fan. You can usually find it on the top of the motor housing or on a sticker attached to the fan. Once you have identified the model number, visit ReplacementRemotes.com or contact our customer service for assistance.

On our website, use the “Brands” drop-down and navigate to the “Harbor Breeze” section.  Next, browse or search for your specific model number. Alternatively, if you choose to contact customer service directly, provide them with your ceiling fan’s model number, and they will be able to assist you in identifying the compatible remote for your Harbor Breeze ceiling fan.

Do I Need to Synch My Remote with My Harbor Breeze Ceiling Fan?

In some cases, you will need to sync or pair your Harbor Breeze ceiling fan remote with your fan. This step is necessary to establish a communication link between the remote and the fan so that they can work together properly.

To sync your remote with your Harbor Breeze ceiling fan, follow these general steps:

  • Ensure that the power supply to the fan is turned on.
  • Locate the “Sync” or “Learn” button on both the receiver (located inside the fan’s canopy) and the remote control, which could be under the battery door.
  • Press and hold down the “Sync” or “Learn” button on the receiver until the LED indicator light begins flashing or changes color.
  • Within a few seconds of activating synchronization mode on the receiver, press and hold down the corresponding “Sync” or “Learn” button on your remote control.
  • Release both buttons once you see the LED indicator light on the receiver stop flashing or change color.
  • Test the remote by adjusting the fan’s speed or turning its lights on and off, ensuring that it responds correctly to your commands.

Please note that these steps are a general guideline, and specific syncing instructions may vary depending on the model of your Harbor Breeze ceiling fan and remote control. It is always recommended to consult the user manual provided with your fan for detailed instructions for your specific product.

Is Using an Aftermarket Remote with My Harbor Breeze Ceiling Fan Okay?

It is okay to use an aftermarket remote with your Harbor Breeze ceiling fan as long as it is compatible. It is recommended to verify with the supplier that the remote control works with your model ceiling fan. However, it is possible that certain features or functions may not work properly with an aftermarket remote.

To ensure the best experience and optimal functionality, it is advisable to use a guaranteed replacement Harbor Breeze remote specifically designed for your ceiling fan model. This ensures seamless integration and reliable performance while maintaining the manufacturer’s standards and design specifications.

Order Harbor Breeze Ceiling Fan Remote Controls Today

It is easy to find guaranteed replacement Harbor Breeze ceiling fan remote controls at ReplacementRemotes.com. Enjoy seamless control of your ceiling fan’s speed, lighting, and more with a wide range of compatible options available. Place your order online now or call us at 855-573-6683 for further assistance.

How to Choose a Ceiling Fan for Your Home

Ceiling fans are not just a functional addition to your home; they also add style and comfort. With so many available options, choosing the right ceiling fan for your home can be overwhelming. From size to design, energy efficiency to noise level, various factors come into play when making this decision.

This guide aims to simplify the process and provide you with all the necessary information to choose a ceiling fan that perfectly fits your needs and elevates the ambiance of your living space, whether it’s for the bedroom, living room, or any other area in your home.

Step-by-Step Approach to Choose the Perfect Ceiling Fan

Step 1: Assess the Size and Layout of the Room

The first step in choosing a ceiling fan is to consider the size and layout of the room where it will be installed. Measure the square footage and height of the room and any architectural features that may affect air circulation, such as sloped or vaulted ceilings.

Step 2: Determine Your Ceiling Height

Ceiling fans come in different mounting options to accommodate various ceiling heights. Measure your ceiling height to determine whether you need a flush-mounted (for low ceilings), standard downrod-mounted, or angled-mount fan (for sloped ceilings).

Step 3: Consider Fan Size for Optimal Performance

Choosing an appropriately sized fan ensures optimal air circulation in your space:

  • Rooms under 75 square feet, opt for a 29-36 inch fan.
  • Rooms between 76-144 square feet, choose a fan with a diameter of 36-42 inches.
  • Larger areas exceeding 144 square feet, go for fans measuring at least 52 inches.

Step 4: Decide on Blade Number and Pitch

Consider the number of blades on your desired ceiling fan. While three-blade fans are more common and provide adequate airflow, four- or five-blade options can contribute to smoother airflow while running quieter. Additionally, pay attention to blade pitch—the angle at which they are set—which affects how effectively the fan moves air.

Step 5: Determine Desired Style and Finish

Ceiling fans come in countless styles ranging from traditional to contemporary designs. Choose one that complements your home’s decor style while also considering finishes that match other fixtures in the room.

Step 6: Evaluate Energy Efficiency Ratings

Look for energy-efficient models that help reduce electricity consumption without compromising performance.

Step 7: Consider Additional Features

Explore features like remote controls, lighting fixtures, fan speed options, and reversible motor functionality. These additional features enhance convenience and add functionality to ceiling fans.

By following this step-by-step approach, you can confidently select the perfect ceiling fan for your home.

Considerations

When choosing a ceiling fan for your home, there are several key considerations to keep in mind:

  • Budget: Determine how much you will spend on a ceiling fan, as prices vary significantly based on brand, features, and quality.
  • Noise Level: Look for ceiling fans that operate quietly, especially if you plan to install them in bedrooms or living areas where noise can be a nuisance.
  • Energy Efficiency: Opt for fans with an ENERGY STAR or high energy-efficiency ratings. These models consume less electricity and help reduce utility bills.
  • Lighting: Consider whether you want a ceiling fan with built-in lighting or prefer separate lighting fixtures.
  • Blade Materials: Blades can be made of various materials, such as wood, metal, or acrylic. Each material has its own aesthetic appeal and maintenance requirements.
  • Control Options: Decide whether you prefer manual, wall-mounted, or remote controls for operating your ceiling fan’s speed settings and other functions.
  • Warranty and Customer Support: Check the manufacturer’s warranty coverage and consider their reputation for customer support before finalizing your decision.
  • Installation: Evaluate whether you have the necessary skills and tools to install the ceiling fan yourself or if hiring a professional installer would be more appropriate.

Styles and Finishes

When choosing the style and finish of your ceiling fan, numerous options are available to suit any home décor, including:

  • Traditional ceiling fans feature elegant, timeless designs with decorative elements and details like ornate fan blades or classic finishes such as brass or bronze.
  • For modern and minimalist aesthetics, contemporary ceiling fans offer sleek lines, understated designs, and often come in neutral colors like white, silver, or black.
  • If you want to add a touch of rustic charm or farmhouse flair to your home, consider ceiling fans featuring distressed wood blades or vintage-inspired finishes like weathered iron or aged bronze.
  • Industrial-style ceiling fans highlight a raw, utilitarian design with features like exposed hardware, metal blades, and metallic finishes such as brushed nickel or matte black.
  • Beach and tropical-themed ceiling fans feature palm leaf-shaped blades made from natural materials (like bamboo) combined with casual finishes such as rattan or wicker accents.

The Importance of Energy Efficiency

Energy efficiency is a crucial factor to consider when choosing a ceiling fan for your home. When selecting an energy-efficient ceiling fan, always look for certification labels such as ENERGY STAR. Here’s why it’s important:

  • Reduced Energy Consumption: Energy-efficient ceiling fans consume less electricity than standard fans, helping you save on energy costs in the long run.
  • Environmental Impact: By choosing an energy-efficient ceiling fan, you actively contribute to environmental conservation by reducing your carbon footprint.
  • Enhanced Comfort: Efficient ceiling fans are designed to move air effectively, creating a cooling breeze that enhances comfort without relying solely on air conditioning. This can reduce reliance on AC or allow you to set it at higher temperatures, resulting in additional cost savings.
  • Longer Lifespan: Energy-efficient ceiling fans are often built with high-quality, durable, and reliable components that last longer.

Additional Features

Apart from the basic functionalities, ceiling fans can have additional features that enhance their convenience and functionality. Here are some popular additional features to consider:

  • Remote Control
  • Wall Controls
  • Integrated Lighting
  • Reversible Motor
  • Timers
  • Variable Speed Settings

Conclusion

Choosing the right ceiling fan for your home involves considering various factors such as size, layout, style, energy efficiency, and additional features. By following a step-by-step approach and these considerations, you can make an informed decision that suits your functional needs and aesthetic preferences.

Ceiling Fan Cables, Receivers, and Remote Controls

Take control of your comfort and convenience now. Explore the range of ceiling fan cables, receivers, and remote controls available from Replacement Remotes. Shop online or call us directly today.

How to Choose the Right Garage Door Opener for Your Home

The importance of having a reliable and functional garage door opener cannot be overstated. After all, it is responsible for the smooth operation of one of the largest moving parts in your home—your garage door. A well-chosen garage door opener not only enhances convenience but also improves security and safety for you and your family.

However, with so many available options today, selecting the right garage door opener can often feel overwhelming. This guide will provide helpful information and factors to consider when choosing the perfect garage door opener for your home. So whether you need a replacement or simply looking to upgrade, let us assist you in making an informed decision that meets all your needs and preferences.

Garage Door Types

There are several different types of garage door openers available on the market today. Each type has its own unique features and benefits, making it important to understand the differences between them before making a decision. Here are some common types of garage door openers and drive systems:

  • Chain Drive: This is the most popular and widely used type of garage door opener. It uses a metal chain to operate the door’s mechanism, pulling or pushing it along a track. Chain drive openers are known for their durability and affordability, but they can be noisy during operation.
  • Belt Drive: This type uses a rubber belt instead of a chain to move the garage door up and down. Belt drive openers tend to be quieter than chain drive models, making them an excellent choice for homes with living spaces above or adjacent to the garage.
  • Screw Drive: These openers use a threaded steel rod to lift and lower the garage door. They require less maintenance compared to chain or belt drives since they have fewer moving parts, but they can produce more noise during operation.
  • Jackshaft: Ideal for garages with limited overhead space, jackshaft openers mount on the side wall near your garage door rather than overhead. They utilize a motorized pulley system that allows for smooth and quiet operation.

Motor Power

The motor power of a garage door opener is an important factor to consider when choosing the right one for your home. Motor power is typically measured in horsepower (HP), and different garage door openers come with varying motor sizes.

For standard residential garage doors, ½ HP motors are usually sufficient. They can easily handle single-car or double-car garage doors made of lightweight materials such as aluminum or vinyl.

However, if you have a heavier or larger door, such as one made of solid wood or insulated steel panels, you may want to opt for a more powerful motor, such as a 1 HP model. These higher horsepower motors provide the necessary strength to smoothly lift and lower heavy garage doors.

It’s essential to match the motor power with the weight and size of your specific garage door to ensure optimal performance and longevity of both the opener and the door itself.

Additionally, keep in mind that some manufacturers offer variable speed or soft start/stop features on their openers. These technologies provide smoother operation while reducing stress on the opener system, further prolonging its lifespan.

Ultimately, considering the motor power that aligns with your specific needs will help guarantee reliable and efficient operation from your chosen garage door opener.

Safety Features

When selecting a garage door opener, it is crucial to consider the safety features included with the unit. These safety features are designed to protect you, your family, and your property from potential accidents or intrusions. Here are some essential safety features to look for in a garage door opener:

  • Photoelectric Sensors: Also known as safety sensors or photo eyes, these devices use infrared beams positioned near the floor on both sides of the garage door. If any object or person breaks the beam while the door is closing, it automatically stops and reverses its direction. Photoelectric sensors prevent accidents by preventing the door from closing on people, pets, or vehicles.
  • Rolling Code Technology: This feature enhances security by ensuring that only your remote control can operate your garage door opener. Each time you press the remote button to open or close the door, a new code is generated. This rolling code system prevents unauthorized access and eliminates interference from neighboring remotes.
  • Manual Release Mechanism: In case of power outages or emergencies where you cannot use electric operation methods, having a manual release mechanism allows you to disengage the motor drive and manually open/close your garage door.

Connectivity Options

In today’s increasingly connected world, garage door openers have evolved to offer various connectivity options. These features provide added convenience, control, and security. Here are some popular connectivity options to consider when choosing a garage door opener:

  • Wi-Fi Connectivity: Garage door openers with built-in Wi-Fi allow you to connect and control your opener using a smartphone or tablet.
  • Smart Home Integration: Many modern garage door openers are compatible with popular smart home platforms such as Amazon Alexa, Google Assistant, or Apple HomeKit.
  • Smartphone App: With a Wi-Fi-enabled garage door opener and corresponding smartphone app, you can conveniently operate your garage door directly from your phone.
  • Battery Backup: Connectivity options may also include battery backup functionality in case of power outages.

Conclusion

Choosing the right garage door opener for your home is a decision that should not be taken lightly. It is essential to consider various factors such as the type of opener, motor power, safety features, and connectivity options. By selecting a suitable garage door opener, you can enhance convenience, improve security and safety measures for your family, and ensure the smooth operation of your garage door.

Garage Door Opener Remote Controls

Did you misplace your garage door opener remote control? It may have worn out, and the button sticks or no longer works. Upgrade now and enjoy seamless access to your garage at the touch of a button.

Experience the convenience and security that comes with our range of high-quality garage door opener remote controls available from Replacement Remotes. Visit our website or contact us today to find the perfect replacement remote for your garage door opener.