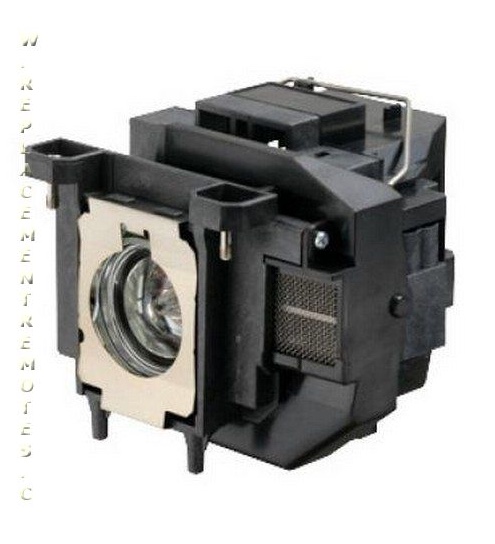
If you are in the market for this Anderic Generics V13H010L62 with OEM bulb Bulb for Epson projector lamp, we have them here in stock at ReplacementRemotes.com. This is the 100{8c8ae2a71b30a2d8c6f534038a85ab39be2a915945a2526b1de25039d71b9e11} direct replacement projector lamp for the original Epson. The original bulb is still used with this projector, there is no quality or compatibility issues. We offer a 6 month warranty and a guaranteed return policy as well. Call today to order your replacement projector lamp, 336 924 8787.
Month: August 2015
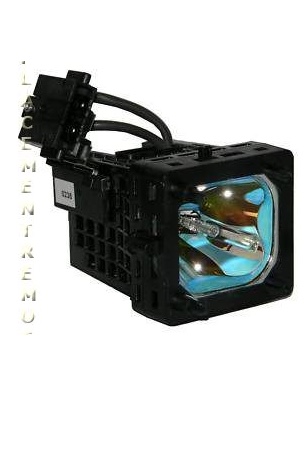
Anderic Generics XL5200 with OEM Bulb for SONY Projection TV Projector Lamp
If you are in the market for this Anderic Generics XL5200-UHP with Philips UHP Bulb for Sony projector lamp, we have them here in stock at ReplacementRemotes.com. This is the 100{8c8ae2a71b30a2d8c6f534038a85ab39be2a915945a2526b1de25039d71b9e11} direct replacement projector lamp for the original Sony. The original bulb is still used with this projector, there is no quality or compatibility issues. We offer a 6 month warranty and a guaranteed return policy as well. Call today to order your replacement projector lamp, 336 924 8787.
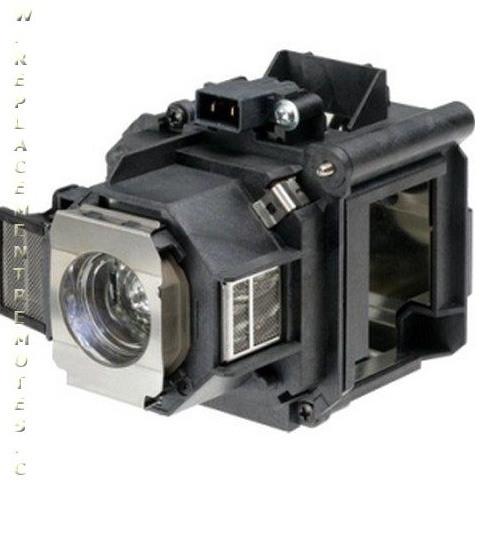
Anderic Generics V13H010L67 with OEM Bulb for Epson Projector Lamp
If you are in the market for this Anderic Generics V13H010L67 with OEM Bulb for Epson projector lamp, we have them here in stock at ReplacementRemotes.com. This is the 100{8c8ae2a71b30a2d8c6f534038a85ab39be2a915945a2526b1de25039d71b9e11} direct replacement projector lamp for the original Epson. The original bulb is still used with this projector, there is no quality or compatibility issues. We offer a 6 month warranty and a guaranteed return policy as well. Call today to order your replacement projector lamp, 336 924 8787.
Save Money by Building Your Own Custom Entertainment Center
The entertainment center is a focal point in most homes, as it houses all of our favorite electronic devices, like the TV, Blu-ray player, home theater system, and video game consoles. Finding the perfect entertainment center for your devices is sometimes challenging. Many prefab entertainment centers offer basic designs or lack the features and storage you require. Rather than invest money into a prefab design, why not consider building your own entertainment center?
Building an entertainment center requires plywood, wood glue, wood screws, and stain or paint in your favorite color. The costs for these materials are a fraction of the cost of a prefab entertainment center. In addition, you are free to choose from a variety of different woods if you want something besides plywood—such as bamboo.
You will also need a circular saw, tape measure, drill, various drill bits, screwdrivers, and paint brushes to apply the stain or paint. Before you visit your local home improvement center, you need to create a rough drawing of how you want your finished entertainment center to appear. Consider the following questions:
- How large will the overall entertainment center be?
- How many shelves do you need?
- Do you want to add storage drawers for TV remotes, game controllers, and other items?
- What size do individual spaces on the shelves need to be?
- Do you want an open back or an enclosed back?
- Do you only need to store devices, or also have space for your TV?
Answering these questions will assist you in making out your shopping list of what you need to purchase. If you need design ideas, there are several great sources of inspiration online from DIY sites. If you want to mount your TV to the wall and free up space on your custom built entertainment center, call Replacement Remotes at 1-855-5-REMOTE (1-855-573-6683) for wall mounts, as well as universal and individual replacement remote controls.
How to Eliminate Home Theater Clutter
Setting up your home theater system involves running a variety of different wires and connections from one component to the next. This leads to wire clutter running from every device to the television and/or receiver. Wiring can create an eyesore and distract from the entertainment devices you have assembled into your home theater system. In addition, every device comes with its own remote controls, increasing clutter on your end table.
Getting your home theater clutter under control is not difficult by following these useful tips:
- Hide surge protectors behind the entertainment center. You can keep them off the floor by attaching a small shelf to the wall behind the entertainment center.
- Use wire ties to bunch wires from each device together. Wire ties also help wires from getting tangled with each other.
- Use an HDMI switch to eliminate multiple HDMI cables running to the TV. With a switch, you only need to run one HDMI cable to the TV.
- For wall mounted TVs, hide wires by running them through the wall from the baseboard to behind the TV. This gives the appearance of a “wireless” setup. If you cannot drill holes in the wall, bunch them together with wire ties and hide them under a wall mountable wire cover.
- Purchase a universal TV remote and program it to control all of your devices. Store the original remotes, with the batteries removed, in a drawer to keep them out of sight.
By taking the time to reorganize your home theater devices, and clean up wire and remote control clutter, you will have an elegant home theater setup. For TV stands, accessories, and universal remote controls, feel free to contact Replacement Remotes at 1-855-5-REMOTE (1-855-573-6683) today.
How to Clean a DVD or Blu-ray Player
While DVD and Blu-ray players are self-contained devices, dust can still get inside the unit and cause playback problems with your discs. One entry point for dust is if the player has a tray that opens and closes to insert and remove discs. Another entry point for dust is that of the vents on the sides or back of the player. To keep your player working correctly, it is important to dust and clean it on a regular basis.
Before cleaning your DVD or Blu-ray player, make sure there is not a disc in the player. Next, unplug it from the electrical outlet, as this will prevent accidental electrical shocks. If the player is in an entertainment center or TV stand where it is more difficult to access, unplug the wires from the back of the player and pull it out.
Using a damp microfiber cloth, gently wipe the top, front, and sides of the player. Do not use a damp cloth on the back of the player as moisture could get into the unit. To remove dust from the back, use a dry cloth or a vacuum with a dusting attachment. After cleaning the outside of the player, reconnect the TV connections and plug it back in.
Lastly, open the tray or insert a lens cleaning disc into the player. Using your TV remote or universal remote, select play, and allow the disc to play through a cleaning cycle to remove dust from the playing mechanisms and laser lens. It is recommended to dust and clean your DVD or Blu-Ray player at least once a month.
For universal remote controls for your DVD and Blu-ray player, call Replacement Remotes today at 1-855-5-REMOTE (1-855-573-6683).
How to Diagnose Problems with DVDs and Blu-Rays
Sometimes there are playback problems when you put a DVD or Blu-Ray disc into your player and press the play button on the remote control. The disc does not play correctly, skips, or does not play at all. The player may display an error message on the TV screen, such as “disc unplayable” or some other error. This is often a sign there is a problem with either the disc or the player. The following tip can help you diagnose the problem and determine the cause.
- Verify the disc is clean. Carefully inspect the bottom of the disc for fingerprints, scratches, and dust. All of these can cause playback problems.
- Clean the disc. Using a microfiber cloth and an approved cleaning product, spray the cleaning solution on the cloth and wipe from the center of the disc outwards. Avoid wiping in a circular pattern, as this can further damage the disc.
- Check for scratches and cracks. Hold the disc under a bright light and see if light passes through the disc in the location of the scratches. If it does, the disc is cracked and is not playable. If not, use an approved scratch removal product to help remove minor scratches.
After trying these tips, allow the disc to dry, and then try to play it again. If it still does not play, try a different DVD or Blu-ray disc to see if it is just that disc. If the other discs do not play in the player, then the problem is most likely the player.
If you need remote controls for your DVD or Blu-ray player, feel free to contact Replacement Remotes at 1-855-5-REMOTE (1-855-573-6683) for further assistance.
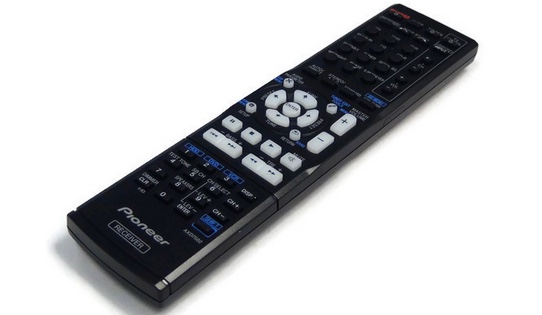
PIONEER AXD7582 Audio/Video Receiver Remote Control
If you are in the market for this Pioneer AXD7582 Audio/Video remote control, we have them here in stock at ReplacementRemotes.com. This is the brand new OEM remote from Pioneer, we offer a 60 day warranty and a guaranteed return policy as well. No programming required, just install new batteries and your all set. Call today and make your order, 336 924 8787.

ONKYO RC835M AV System Remote Control
If you are in the market for this Onkyo RC835M AV System remote control, we have them here in stock at ReplacementRemotes.com. This is the brand new OEM remote from Onkyo, we offer a 60 day warranty and a guaranteed return policy as well. No programming required, just install new batteries and your all set. Call today and make your order, 336 924 8787.
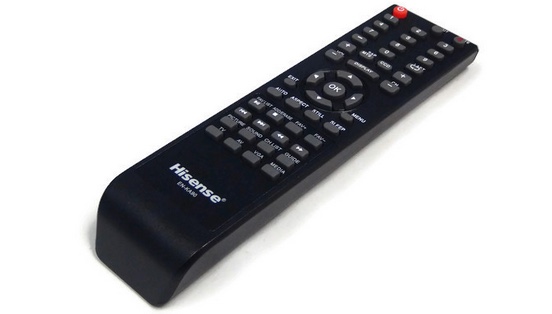
HISENSE ENKA90 TV Remote Control
If you are in the market for this Hisense ENKA90 TV remote control, we have them here in stock at ReplacementRemotes.com. This is the brand new OEM remote from Hisense, we offer a 60 day warranty and a guaranteed return policy as well. No programming required, just install new batteries and your all set. Call today and make your order, 336 924 8787.